
Overview:
Each Space in ScaleGrowth can be customized with its own set of Search and Filters. This allows you to control how content is organized, displayed, and searched within each individual space–helping your users discover relevant content faster.
Accessing Space Settings
- Navigate to the Space you want to configure.
- Click on the Settings icon (⚙️) in the upper-right corner of the Space.
- In the settings panel (just below the Space name and listing name), you’ll see configurable options related to Search and Filters.
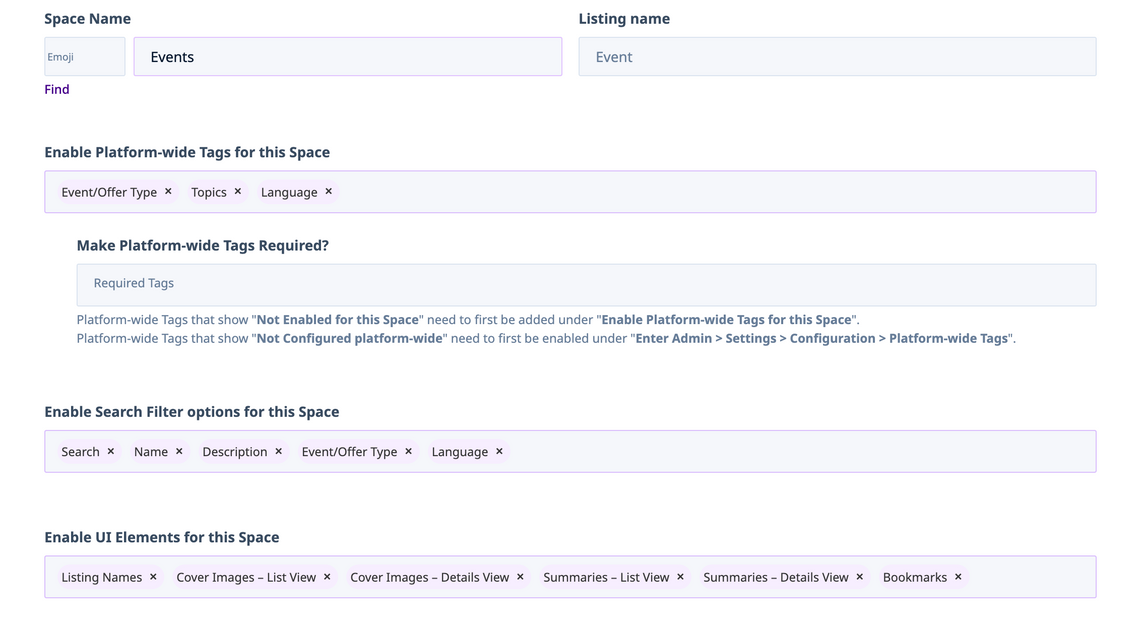
1. Enable Platform-wide Tags for This Space
This setting determines whether platform-wide tags are enabled for use within this Space.
- Enable this setting to allow the Space to use tags you’ve already defined under your Platform-wide configuration.
- Once enabled, you can select which Tags are available in this Space to tag each content items, as well as use as Filter options
- You can also mark specific tags as required for content created in this Space. This ensures every new item has the appropriate tagging from the start.
✅ Use this if you want consistent tagging across Spaces or need to enforce tagging for content governance.
2. Enable Search and Filter options for This Space
This setting controls which search and filter options to enable in the Search & Filter bar for the Space.
- You can customize the UX by showing/hiding elements like: Tags, Last Active, Sort By
- You should only select Tags that were enabled in step 1.
- This gives you granular control over how users interact with the Space’s Search & Filter functionality.
In addition, if your Space happens to be a Listing Space using a custom Listing Template, you can also add in any of the Fields from the Listing Template as Search Filters. To do this:
- Enter Admin
- Navigate to the Space you wish to customize Search & Filters for
- Click the Edit Search Filters in top right (to the left of the Settings button)

- Select the fields you wish to use under the Show as Filter column
- Save
🎯 Useful for tailoring the user experience to your specific content strategy.
3. Enable Saved Searches
Saved Searches work in conjunction with your Space filters to create predefined Filter shortcuts.
To enable them:
- Go to Enable UI Elements for This Space.
- Select "Saved Searches" from dropdown options.
Once enabled, you can define Preset Search Shortcuts based on filter selections, making it easy for users to find content by topic, type, or other filters.
🔁 Great for surfacing frequently accessed Categories and Tags.
4. Saved Searches UI Options
When Saved Searches are enabled, this setting lets you display them as buttons or clickable tabs at the top of your Space.
- These tabs act as shortcuts to filtered content views.
- Particularly useful when customers want to highlight key content segments according to your needs.
🧠 Pairs well with Saved Searches to improve discoverability and navigation.
Summary
Here’s a quick rundown of Search & Filter settings for each Space
- Enable Platform Tags for This Space: Enable and select platform-wide tags for this space.
- Required Platform Tags (Optional): Force users to assign specific tags to every new content item.
- Show Default Search Filter: Customize which filters and UX elements are visible to users.
- Enable Safe Searches: Activate predefined filtered views based on tag criteria.
- Show Safe Searches as Tabs: Display those saved searches as quick-access buttons/tabs on top of the Space.
🔗 Related Articles
- Using Platform-wide Tags
- Best practices for using Tag Sets
- Using Saved Searches and Personalized Digests for Member-Centered Discovery
- Using Hard Filters for Custom Recommendation Logic (Enterprise Feature)
